Thursday 7 June 2012

New Skirt

It's been lovely weather here lately so instead of crafting and blogging I've been outside enjoying the sunshine :) But now it's grey and miserable again so I'm back on the computer!

I did do a little bit of crafting - When the sun came out I decided I wanted a new skirt so made this out of a granny nightie I bought for £5 at a charity shop.


This is how I made it!

I've lost most of my pictures for this tutorial but it was quite simple to do.

Basicly I cut off the bottom part and added and elasticated waist - done!

More detailed instructions:

  1. Measure from the hem to the length you would like the skirt (the top part will sit around the waist) plus about 3 inches and cut from the nightie.
  2. Measure around your waist and cut a piece of elastic this length plus an extra half inch and stitch the two end to make a circle.
  3. Hand wind your bobbin with elasticated thread.
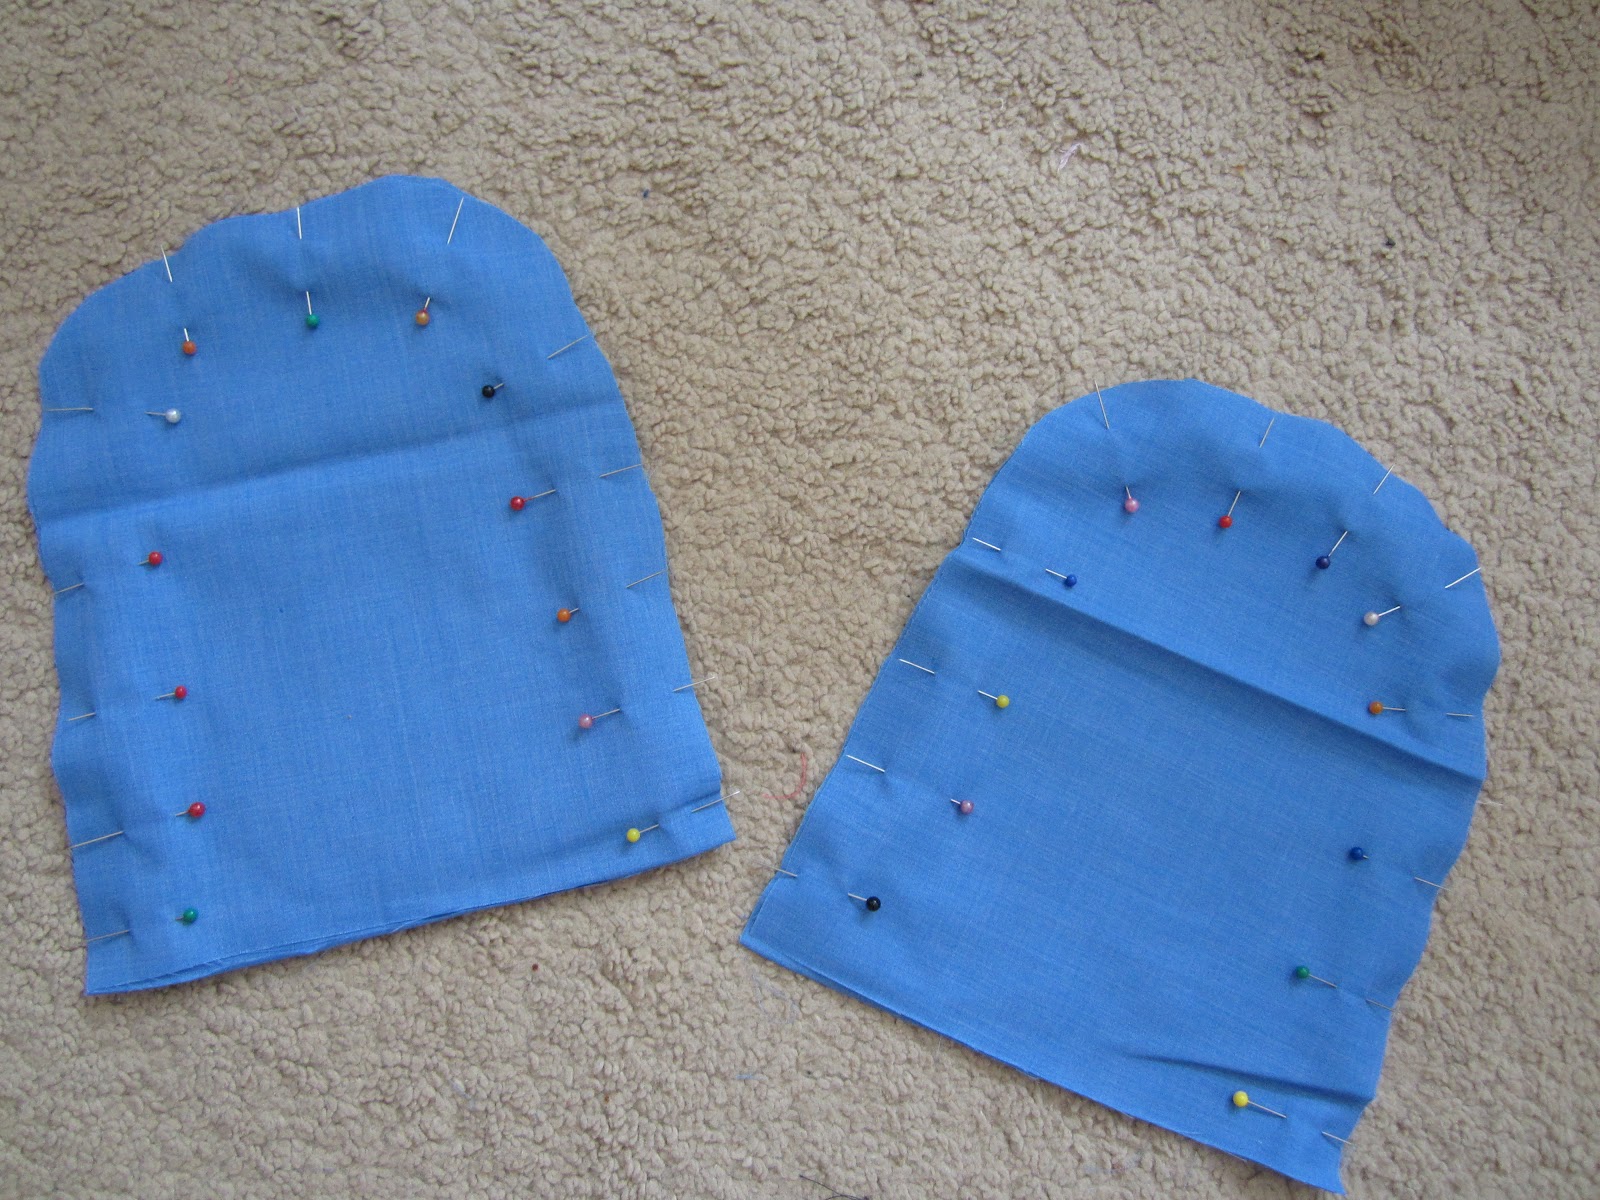
  4. Turn over the top of the skirt like you're making a hem with the elastic in side. Like this:


This can be a bit tricky because the elastic should be smaller than your skirt but go with it!

     5. Sew this together - make sure you don't sew the elastic to the fabric!
         

And this is what you're left with . .  .


Elasticated waists are great but not the prettiest things so I covered mine with a thick waist belt.


Vote For Me!


It only takes one click


Partying @

(Monday) makingtheworldcutersewchattysewcandoskiptomyloufirefliesandjellybeansetcetorizeeverythingunderthemoonnotjustahousewifegraphicsfairythegirlcreativecreatingreallyawesomefreethingscraftomaniacthegunnysacklinesacrossmyfacesumossweetstuffalderberryhillinspiredbyfelicityvintagemauvecedarhillranchserendipityandspicebrassyappleetcetorizehandmadeharbourpinkapotamus


(Tuesday) ladybugblessingscoastalcharmthecreativeitchboutiqueromanceonadimetipjunkietodayscreativebloghopestudiossugarbeecraftscleanandscentsiblelillunakammyskornerathomewithkmyuncommonsliceofsuburbiahomestoriesatozitsoverflowingelizabethandcoteaganstravelsuncommondesignsonlinedebbiedoescreationshousewivesofrivertonadventuresofadiymom

(Wednesday) nightowlcraftinggingersnapcraftssomedaycraftsjunkintheirtrunkthestuffofsuccesstearosehomesew-much-adoacreativeprincesshouseofhepworthsthenymelrosefamilythetrendytreehousemicheleravendesignsfreeprettythingsforyoucreationsbykaramyrepurposedlifetheshadyporchthediydreamerjaqsstudiojaimelyn11raegunwear


(Thursday) firefliesandjellybeansdelightfulorderkadie-sevenalivesomewhatsimplespruceyournestbeyondthepicketfencetheshabbycreekcottagemomnivoresdilemmathe36thavenuethevintagefarmhouselovenotesbylaurynthetreasuristastaceyembracingchange


(Friday) happygoluckyjustusfourblogfivedaysfivewaysromantichomethenotsofunctionalhousewifeblissfulanddomesticshabbynestfindingfabulousblogcreationcornerbacontimewiththehungryhypolittlebeckyhomeckymarriagefromscratchkitchenfunwithmy3sons


Thursday 17 May 2012

Bunting

So this is the tutorial for the bunting I made.


I'm sure many of you know how to make bunting but there are lots of different methods so I thought I would share mine.

Usually I'm one for cutting corners - if there's a quicker way to do something I'll do it! But for this project I wanted to do something the right way for a change, which I think is why I loved the finished product so much, I was proud of my hard work and dedication - this literally took me weeks to finish! (because I have a short attention span so had to do it in lots of little sessions.)

OK, on with the show!


The first thing I did was cut out my triangles, I measured 6 inches across and 6 inches down from that line to get my first triangle, then used that piece of fabric as my template (OK so maybe I took one short cut, I should of cut out a cardboard template, and I wish I did, I use one now and it's a lot easier!)


Once all my triangles were cut out I cut some wadding in the same shape and tore it into thin layers. (It's should come apart easily.)


Next I layered two triangles with the right sides facing inwards then wadding on top and sewed.

Start from one of the top corners, work your way down to the point, lift your presser foot, twist and work your way up to the other corner. (NOT what I did on my first triangle, which was go down one side, finish off then start down the other side to discover the fabric is bunched up at the point!)


Turn all your triangles inside out and iron, and you have your flags  : )

For the binding I used 3 metres of ribbon (1 inch width), I've recently discovered that bias binding works better but I was still learning at this point.

So what I did was iron the ribbon in half length ways, slot each flag into it, then sew along the open edge.

I used 13 flags with a 3 inch gap between each one.

The finished product!!


These are all the pieces of bunting I've made so far, which I sold to Coco's


If you would like to buy some bunting my shop is: etsy.com/shop/lauralynncrafts
(Please note: the bunting I sell doesn't include the wadding - it was getting too expensive and time consuming and that was the best way to reduce the cost without losing quality)


Vote For Me!
(It only takes one click)

Partying @ threadingmyway
(Monday) makingtheworldcutersewchattysewcandoskiptomyloufirefliesandjellybeansetcetorizeeverythingunderthemoonnotjustahousewifegraphicsfairythegirlcreativecreatingreallyawesomefreethingscraftomaniacthegunnysacklinesacrossmyfacesumossweetstuffalderberryhillinspiredbyfelicityvintagemauvecedarhillranchserendipityandspicebrassyappleetcetorize


(Tuesday) ladybugblessingscoastalcharmthecreativeitchboutiqueromanceonadimetipjunkietodayscreativebloghopestudiossugarbeecraftscleanandscentsiblelillunakammyskornerathomewithkmyuncommonsliceofsuburbiahomestoriesatozitsoverflowingelizabethandcoteaganstravelsuncommondesignsonlinedebbiedoescreationshousewivesofrivertonadventuresofadiymom

(Wednesday) nightowlcraftinggingersnapcraftssomedaycraftsjunkintheirtrunkthestuffofsuccesstearosehomesew-much-adoacreativeprincesshouseofhepworthsthenymelrosefamilythetrendytreehousemicheleravendesignsfreeprettythingsforyoucreationsbykaramyrepurposedlifetheshadyporchthediydreamerjaqsstudiojaimelyn11raegunwearspruceyournest


(Thursday) firefliesandjellybeansdelightfulorderkadie-sevenalivesomewhatsimplebeyondthepicketfencetheshabbycreekcottagemomnivoresdilemmathe36thavenuethevintagefarmhouselovenotesbylaurynthetreasuristastaceyembracingchange


(Friday) happygoluckyjustusfourblogfivedaysfivewaysromantichomethenotsofunctionalhousewifeblissfulanddomesticshabbynestfindingfabulousblogcreationcornerbacontimewiththehungryhypolittlebeckyhomeckymarriagefromscratchkitchenfunwithmy3sonsthegrantlife


Thursday 10 May 2012

Bunting Bunting Bunting!

Bunting, bunting, bunting . . . if you say the word too many times it loses all meaning!

So I know I haven't posted anything new in a while and that's because I've gone bunting crazy!!


I made this bunting last week planning to post a tutorial. I loved the finished product so much and at risk of sounding big headed thought it was good enough to sell, so that's what I've been trying to do. I made a few more samples and on Tuesday visited every craftly, gifty or boutique shop in Hereford (there are alot!) The first shop loved it and ordered six pieces so I was on a real high but unfortunately nowhere else ordered any :( However they all said they liked it and a couple of places wanted my card so that if anyone asked about bunting they could give them my details. That was excited, apart from the fact that I don't have a card. Also alot of places asked if I have a website, which I did't (apart from this but that wouldn't really be helpful when trying to sell bunting!)

So anywho, to cut a long story short, I've been setting up an etsy shop, ordering business cards and saying the word 'bunting' a ridiculous amount of times!

I need to make five more pieces of bunting by Monday (working all day Friday and visiting my Mum for her birthday all day Sunday!!) so won't be able to post the tutorial until next Tuesday, then normal service will be resumed!

In the mean time please have a look at my etsy shop . . .

www.etsy.com/shop/lauralynncrafts

And vote for me on the fence (it only takes one click)


THANK YOU!  : )

Monday 30 April 2012

The Easiest Dress You'll Ever make . . . Seriously!


This dress was so easy to make using a jersey fabric, I've made a couple like it now and people can't believe how easy it is once I tell them the method.

First measure around the largest part of your body (for me this is my bum!) add one inch for seam allowance and a few more inches depending on how loose fitting you want your dress (I added four inches in total to my measurement).

Cut the width and height (depending on how long you want it - add around two inches on the length you want).

Lay out your fabric and fold the width in half then pin he open side.


All the measuring and cutting is the hardest part so you're on the home straight now (not sure why I used a sports metaphor!)

Anyways, sew a straight stitch all the way down the open edge then sew again with a zigzag on the outside, as close to the original stitch as you can - this is a very important step, jersey fabric doesn't sew too well and my first attempt at this style resulted in a small hole appearing around the bottom area - very embarrassing when it's pointed out to you my your father-in-law!!
But adding the zigzag keeps everything together!

Trim off the excess fabric.


Keeping the stitching on the outside, twist your fabric so the seam is in the middle. Place a top over the fabric and use as a guideline to cut to the bottom of the sleeves and pin across the top to the neck line. Not sure if that made sense, hopefully the picture will help!


Sew where you have pinned, turn inside out and you have a dress! It will look like a sack when you first put in on but it will be fine once you add a waist belt!

Depending on the fabric you've used you might need to add some hems but the fabric I used (a woolly jersey fabric) doesn't fray and I quite like the rolled up edges it produces.


Vote For Me!


Partying @

threadingmyway
(Monday) makingtheworldcutersewchattysewcandoskiptomyloufirefliesandjellybeansetcetorizeeverythingunderthemoonnotjustahousewifegraphicsfairythegirlcreativecreatingreallyawesomefreethingscraftomaniacthegunnysacklinesacrossmyfacesumossweetstuffalderberryhillinspiredbyfelicityvintagemauvecedarhillranchserendipityandspicebrassyappleetcetorize


(Tuesday) ladybugblessingscoastalcharmthecreativeitchboutiqueromanceonadimetipjunkietodayscreativebloghopestudiossugarbeecraftscleanandscentsiblelillunakammyskornerathomewithkmyuncommonsliceofsuburbiahomestoriesatozitsoverflowingelizabethandcoteaganstravelsuncommondesignsonlinedebbiedoescreationshousewivesofrivertonadventuresofadiymom

(Wednesday) nightowlcraftinggingersnapcraftssomedaycraftsjunkintheirtrunkthestuffofsuccesstearosehomesew-much-adoacreativeprincesshouseofhepworthsthenymelrosefamilythetrendytreehousemicheleravendesignsfreeprettythingsforyoucreationsbykaramyrepurposedlifetheshadyporchthediydreamerjaqsstudiojaimelyn11raegunwear


(Thursday) firefliesandjellybeansdelightfulorderkadie-sevenalivesomewhatsimplespruceyournestbeyondthepicketfencetheshabbycreekcottagemomnivoresdilemmathe36thavenuethevintagefarmhouselovenotesbylaurynthetreasuristastaceyembracingchange


(Friday) happygoluckyjustusfourblogfivedaysfivewaysromantichomethenotsofunctionalhousewifeblissfulanddomesticshabbynestfindingfabulousblogcreationcornerbacontimewiththehungryhypolittlebeckyhomeckymarriagefromscratchkitchenfunwithmy3sons


Friday 27 April 2012

My Button

I MADE A BUTTON!! I'm so proud of myself, I'm really not techy at all so this was a big achievement!

Look how pretty...

Bits n Bobs

Wednesday 25 April 2012

Pockets and Puff Ball (Skirt Refashion)

I've had this skirt in my wardrobe for years . . . 

There's nothing particularly wrong with it but I was getting a bit bored of it so decided to jazz it up a bit.

The first thing I did was add pockets (because pockets in skirts are awesome).

To do this, cut out four pocket shapes using your hand as a guideline.


Pin two pairs together.


Stitch and trim.


Turn them inside out and you will have two pouches that look like this . . .


Unpick the side seam in your skirt where you want your pockets to be. Turn inside out and poke your pouch through as shown below.


Sew the pocket to the skirt and when you turn the skirt around it will look like this . . .


Push the pocket in and it will look like this . . .


Voila - you have a skirt with pockets!!

I wanted a bubble skirt so I ruffled the hem of the skirt. To do this I did a running stitch around the bottom edge - it took FOREVER - then pulled the thread to bunch up the fabric.

I then sewed the outer layer to the under skirt and it was complete! :)


Vote For Me!


Partying @


Monday 23 April 2012

T-Shirt Transformation

I work in a Blockbuster store, which is not great considering I have a Psychology degree . . . where did my life go wrong?! Anyway, the reason I'm telling you this is because for months I have worn the most hideous, uncomfortable shirt as my uniform, last week I had had enough and was moaning to the manager who said I could buy my own top if I wanted - happy days! So I bought a new blue t-shirt, it was a men's because I couldn't find a cheap blue women's top and I don't care what I look like at work! I go into work in a very good mood wearing my new comfy top to find that we have all been issued new uniforms! Argh!! So now, not only do I have to wear a black top saying "preorder your games today", but I'm left with a men's T-shirt I had no intension of wearing outside of work.

But every cloud has a silver lining and this one was that I got to do some crafting - yay :)

TUTORIAL


so this is the shirt (£2.50, Primark) . . . I didn't like the fit, the sleeves or the neckline . . .

The first thing I tackled was the shape . . .

Put on the shirt inside out and pin along your waist line, sew and cut off the excess.


Next cut the sleeves to your desired length and hem.


For the neck, fold shirt in half and use a neckline you like as a template. Mark and cut.


To make the neck line more interesting pinch sections of the fabric then fold down and pin. Play about until you have the look you want then tack the pleats.


Fold over and hem the neckline.


For a finishing touch I added a couple of ruffle flowers made from the fabric cut off the sleeves (I hate wasting things!)


For an excellent tutorial on how to do ruffles by Ruffles And Stuff (the clues in the name!) click here.

I love this top now, mainly because it's super comfy (a must for me), but also because it's versatile - it can be worn with both smart and casual outfits . . .


Thanks for stopping by :)


Vote For Me!


Partying @

(Monday) makingtheworldcutersewchattysewcandoskiptomyloufirefliesandjellybeansetcetorizeeverythingunderthemoonnotjustahousewifegraphicsfairythegirlcreativecreatingreallyawesomefreethingscraftomaniacthegunnysacklinesacrossmyfacesumossweetstuffalderberryhillinspiredbyfelicityvintagemauvecedarhillranchserendipityandspicebrassyappleetcetorize


(Tuesday) ladybugblessingscoastalcharmthecreativeitchboutiqueromanceonadimetipjunkietodayscreativebloghopestudiossugarbeecraftscleanandscentsiblelillunakammyskornerathomewithkmyuncommonsliceofsuburbiahomestoriesatozitsoverflowingelizabethandcoteaganstravelsuncommondesignsonlinedebbiedoescreationshousewivesofrivertonadventuresofadiymom

(Wednesday) nightowlcraftinggingersnapcraftssomedaycraftsjunkintheirtrunkthestuffofsuccesstearosehomesew-much-adoacreativeprincesshouseofhepworthsthenymelrosefamilythetrendytreehousemicheleravendesignsfreeprettythingsforyoucreationsbykaramyrepurposedlifetheshadyporchthediydreamerjaqsstudiojaimelyn11raegunwear


(Thursday) firefliesandjellybeansdelightfulorderkadie-sevenalivesomewhatsimplespruceyournestbeyondthepicketfencetheshabbycreekcottagemomnivoresdilemmathe36thavenuethevintagefarmhouselovenotesbylaurynthetreasuristastaceyembracingchange


(Friday) happygoluckyjustusfourblogfivedaysfivewaysromantichomethenotsofunctionalhousewifeblissfulanddomesticshabbynestfindingfabulousblogcreationcornerbacontimewiththehungryhypolittlebeckyhomeckymarriagefromscratchkitchenfunwithmy3sons


Saturday 14 April 2012

How To Make An Infinity Scarf

Last week I used this fantastic aztec material to make a pencil skirt,


I was left with a few pieces and didn't want to waste them so decided to make a snood.

I trimmed the largest piece to make a rectangle, folded in half (print on the inside) and pinned in place.


Tip from my mum: if you pin your fabric as shown you don't need to take out your pins when sewing - genius (I'm sure most people already know this but it was a revelation to me! Plus I was having fun with my new camera and love the picture of the pins so had to include it)


 Sew along the pinned edge leaving about 2-3 inches open at one end.


Twist the fabric a few times.


Next pin the two open ends together with the patterned sides facing inwards and sew together.


Turn the fabric right side out you will be left with a small hole that needs to be hand sewn.


Once this is done your snood is complete!!


It could be left like this but my fabric wasn't big enough to make a decent sized scarf so I adapted the idea shown in nette's blog and used the rest of my fabric to make two more mini snoods to add volume. I attached them all together at the back and this is what I was left with . . .


Vote For Me!